Caramelized Banana Bread

I recently discovered that the secret to richly flavored banana bread is to roast your bananas until their natural sugars caramelize and their flavor becomes concentrated goodness. I use coconut oil because it’s less work than butter and its lack of water content means less risk of the bread drying out in the oven. But you can use butter if you prefer the flavor.
This is a small loaf that comes out very sticky and a bit oily. I like it that way. Maximum moistness. Sorry for saying moist. Oh, I said moist again. Sorry. Moist.

….Moist

Some more notes- a Silpat is key in this method because you’ll want to scrape up the roasted banana juice (?) to incorporate into the bread. This is the caramelized bit.

Also, I highly recommend ordering cinnamon from Burlap and Barrel. They aren’t paying me, I am just a huge fangirl and this cinnamon changed my life. It is a flavor you never thought would be possible.
If when I say “fold the batter” you’re having a David from Schitt’s Creek moment, fold means to scoop the batter with a spoon or spatula from the bottom of the bowl and flip the bottom batter over the top. How to fold batter.

Caramelized Banana Bread

Ingredients:

3 ripe bananas
1/2 cup coconut oil
1/2 cup refined sugar
1/4 cup brown sugar
1 egg
Vanilla extract, measure with your heart
1 cup all-purpose flour
1 tsp baking powder
1 tsp Kosher salt
1 tsp cinnamon

Equipment:

Baking tray
Silicon mat
Prepared loaf pan (greased with butter or oil and dusted in flour)
Whisk
Spatula
Mixing bowl

Slices of sticky, rich banana bread

Method:

  1. Preheat the oven to 350 degrees. Add the peeled bananas to a tray with a silicon mat on it. Bake the bananas for 20-30 minutes, until they are brown and smell toasty. There should be some caramelized sugary bits on the mat.

  2. Add the bananas to a mixing bowl. Scrape up all the caramelized juice from the mat and add it to the bowl. Add the coconut oil, white sugar, and brown sugar to the bowl and mash well.

  3. Add the egg and vanilla to the bowl and mix well until the egg and sugar are fully blended into the batter.

  4. Add the remaining ingredients and gently fold the batter until it comes together.

  5. Pour the batter into the pan and bake for 45 minutes at 350 degrees.

Zucchini Basil Pasta Salad

A fresh, light lunch or potluck dish and good use of the excess zucchini we see in summer time. Eat warm or chilled. This makes about two meal sized portions, or 6 side dish portions.

zucchini-pasta-salad

Method:
1. Break the spaghetti into quarter length and cook in salted boiling water for 9 minutes.
2. While spaghetti is cooking, shred the zucchini in to a mixing bowl. Then tear off the basil leaves into a blender. Add lemon juice, walnuts, cheese, salt, and oil into the blender and blend on low until pesto consistency.
3. Add the blended mixture to the zucchini and mix. Taste, adjust seasoning.
4. When the pasta is cooked, drain and add tot he zucchini. Toss and either serve or chill.

Ingredients:
3 ounces spaghetti noodles
2 medium zucchini
1 bunch of basil
Juice of 1 lemon
2 tbsp walnuts, toasted
4 ounces of parmesan or romano cheese
Pinch of salt
1/4 cup olive oil


Pin This!

Zucchini Basil Pasta Salad.png

Italian Beef Sandwiches

A rich, tender beef made in the pressure cooker or instant pot. I made the buns, too, but they aren’t amazing enough to include the recipe. I’ll keep working on my bread skills.

Ingredients
Beef:
2 pounds chuck roast, cut to 1” thickness
Salt
Black pepper
2 tsp vegetable oil
1 onion, chopped
1 tsp fennel seed
1 tsp dried basil
1 tsp dried oregano
1 cup beef broth
1 tbsp tomato paste
2 tbsp balsamic vinegar

Sandwich:
Sandwich roll
Mama Lil’s Peppers
Soft goat’s cheese

italian-beef

Method:
1. Turn on your pressure cooker to the saute method. While it warms, coat the chuck roast in salt and pepper. Add the oil to the pot, then brown the beef for several minutes. Add the onion, fennel, basil, and oregano, and cook for two more minutes.
2. Stir together the broth, tomato paste, and vinegar in a bowl or measuring cup and add to the beef. Close the lid on the pressure cooker and switch to high pressure for 45 minutes.
3. Once the cook time is over, release the pressure and drain off excess liquid (save for gravy for other dishes!). Shred the beef with two forks and adjust liquid levels if needed.
4. Assemble sandwiches and enjoy!

Pin This!

italian-beef-sandwich

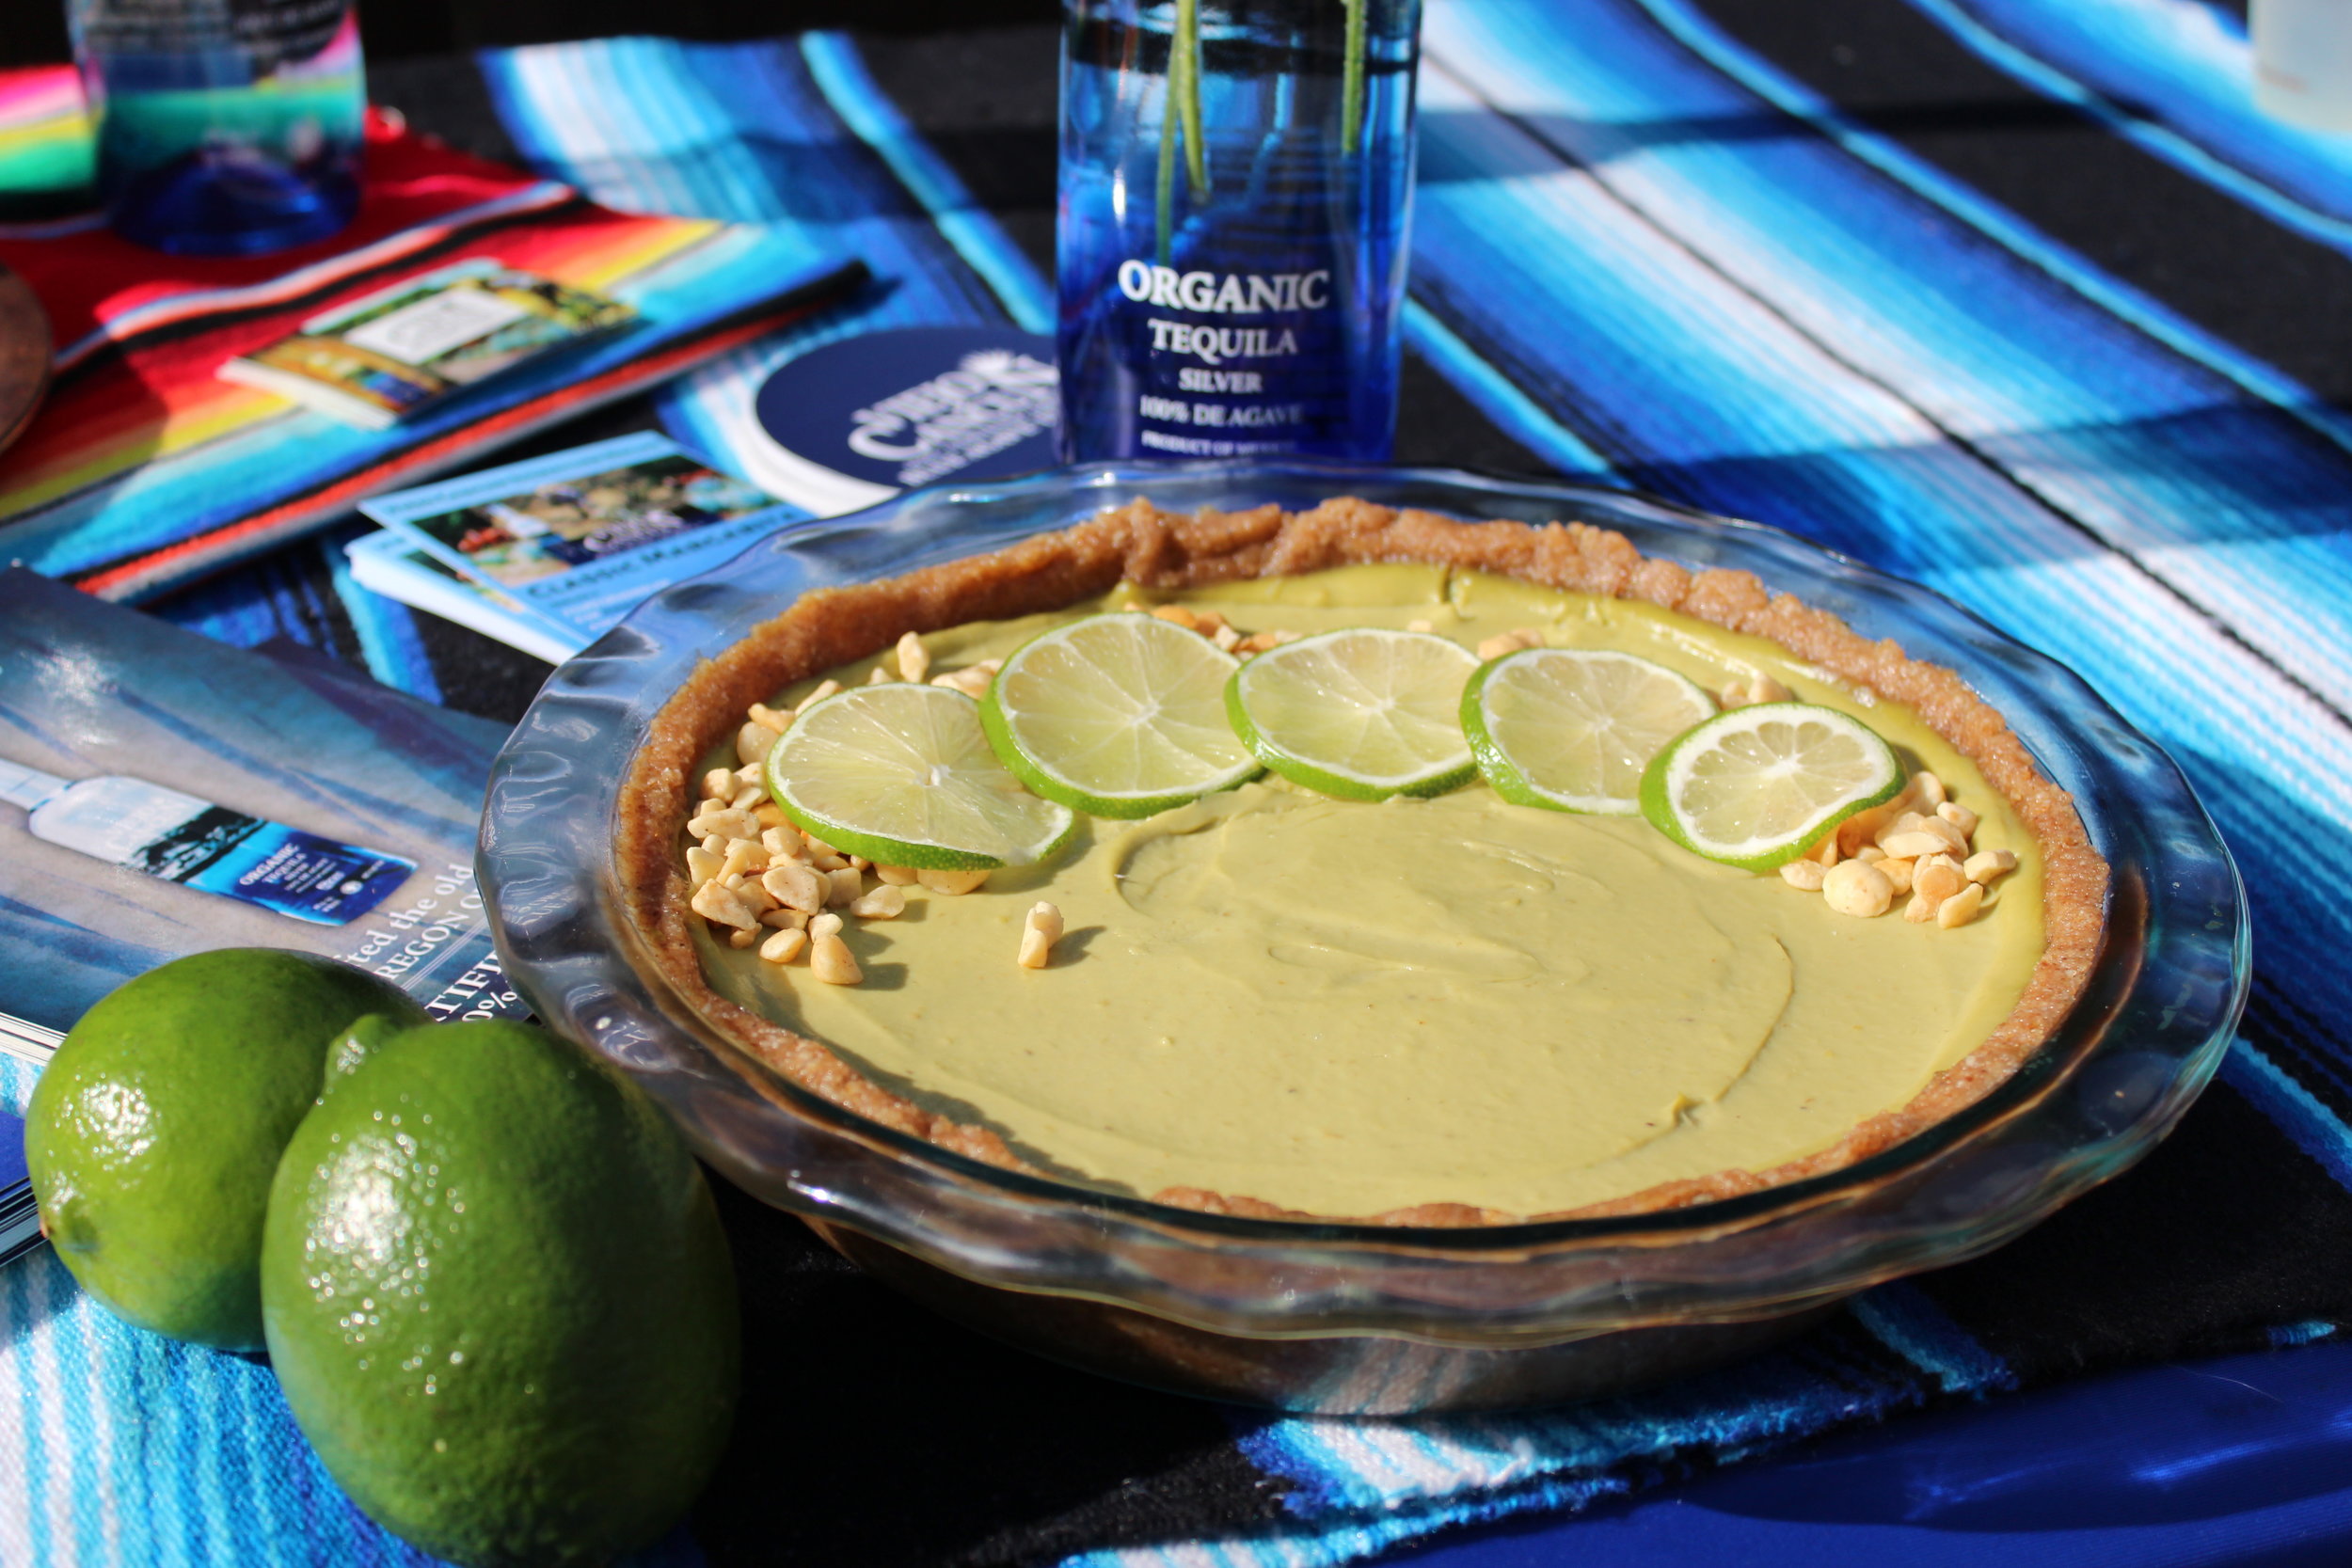
No Bake Tequila Lime Pie

I recently had the pleasure of joining forces with Studio 541 to produce a new local program called “Musicians and Pie”. We had a fabulous sponsor for the event, which included an intimate house concert from Fortune’s Folly (acoustic version), and I was asked to make a key lime pie to pair with Viejo Cancun’s organic tequila. I thought, why not put the tequila in it!?

tequilalimepie

Ingredients

Crust:
1 cup coconut flakes
1 cup almonds
1 cup pitted dried dates
1 tsp Viejo Cancun organic tequila
1 tsp vanilla extract

Filling:
Zest of 3 limes
2 large avocados
2 bananas (better if slightly green still)
1/4 cup agave syrup
1/2 cup lime juice
1 tsp Viejo Cancun organic tequila

Method:
1. For the crust, toast the coconut and almonds in a dry pan on medium heat for 3-5 minutes, until fragrant and toasty.
2. Place all the crust ingredients in a food processor and process until the mixture starts to clump together.
3. Press the crust mixture into a pie plate.
4. Process the filling ingredients in a food processor until smooth and creamy.
5. Chill pie for at least 2 hours before serving.

Pin This!

No Bake Tequila Lime Pie.png

Thai Style Rice Mess

I struggled with what to call this dish because while it started with an inspiration for larb, it ended up being a little too “ricey” and a little too “salady”- then again, not quite salady enough to be a salad. I thought it was more of a dirty rice flavored with Thai ingredients, so rice mess it is. I have a feeling rice mess will become a household signature dish in many varieties.

Read More

Shrimp and Salmon Stew (Instant Pot Recipe)

Makes 2 bowls plus extra soup for leftovers or alternative use. About 400 calories per bowl if you eat all the shrimp and use 4 ounce salmon filets.

Salmon Shrimp Stew.png

NOTE: I used a pressure cooker (Instant Pot) and an immersion blender for this recipe. If you don’t have those, (first of all, GET THEM they are awesome) you can cook the broth in a regular pot for 40 minutes instead of 20, and either blend it in a regular blender or skip the blending, you’ll just lose some of the richness of the broth.

Ingredients

  • 3 Salmon filets

  • 1 pound of shrimp

  • 1 onion, chopped

  • 1.5 cups carrots, shredded or diced

  • 2 celery stalks, chopped

  • 2 red bell peppers, diced

  • 2 cups chicken broth

  • 2 cups of white wine

  • 1 can fire roasted tomatoes

  • 1 tbsp paprika

  • 1 tbsp dried herbs (I used basil and oregano)

  • 1 tbsp olive oil

  • 1/2 cup diced shallots

  • 1/4 cup minced garlic

  • 1/4 cup tomato paste

  • Salt to taste

  • Fresh parsley

Instructions

Place one salmon filet, 1/4 of the shrimp (peel on), onion, half the carrots, celery, half of the bell pepper, chicken broth, wine, tomatoes, paprika, and dried herbs into the Instant Pot on soup mode for 20-25 minutes. Once cooked, blend into a puree with an immersion blender keep it on warm heat.

Peel the rest of the shrimp and place in a heat proof bowl. Poor hot broth over a fine sieve onto the remaining peeled shrimp. Discard the broth solids after pressing them into the sieve gently. This should cook the shrimp. if not, boil some of the broth and pour it back into the bowl.

Meanwhile, sauté the remaining carrots and bell pepper, shallots, and garlic for ten minutes on medium low heat. Add the tomato paste and cook several more minutes. Move the vegetables to the side of the pan and add the remaining two salmon filets, and cook about 6 minutes skin side and 3 minutes flesh side.

For a heartier soup, reduce the access broth in the saute pan after removing the salmon. A ten minute reduction will thicken it slightly and give it more flavor.

Plate the salmon and veggies into the bowl, and ladle the shrimp with broth over it. Garnish with parsley and serve.


Pin this!

20.png

Vietnamese Meatball Salad with Peanut Dressing

Serves 4, 550 ish calories per serving

Ingredients

Meatballs

  • 1 pound ground pork

  • 2 tbsp fish sauce

  • Juice of half a lime

  • 1 shallot, grated (or 2 garlic cloves)

  • 2 tsp dried ginger

  • 3 tbsp brown sugar

Dressing

  • 2 tbsp peanut butter

  • 2 tbsp soy sauce

  • 2 tbsp rice vinegar (or lime juice)

  • 2 tbsp honey or brown sugar

  • Water as needed

Assembly

  • 2 cups of cooked rice noodles

  • 1 head of butter lettuce, torn roughly

  • 1 sliced cucumber

  • Shredded carrots to taste

  • Cilantro to taste

pork-meatballs-vietnamese

Mix the meatball ingredients together until well combined.

Lay the pork mixture out onto a flat disc and divide into 8 even “slices” like a pizza. Roll each slice between your palms until you get a ball.

Wash your hands ;) and preheat a skillet to medium high. Add the meatballs to the skillet and let sizzle until cooked through, about 8 minutes on each side (cut meatballs in half if you want them to cook faster).

Meanwhile, mix the dressing ingredients together until well combined. You can microwave them for 15 seconds to loosen them up if needed.

Cook rice noodles according to their package directions, and rinse them with warm water.

Arrange the noodles, lettuce, cucumber, carrots and cilantro on plates. Add the cooked meatballs and drizzle with the peanut dressing. Top with cilantro.

Pin it!

Vietnamese Meatballs.png